
Everything you need to create YouTube videos
Share
If you are an artist, a creative person, or a business owner looking to explore YouTube as a marketing channel (or just someone looking to explore YouTube as a content platform) but you are not sure how to get started, then you are in the right place!
In this blog, I’ve gone over what I started with when I decided to start making YouTube videos and how I went about making upgrades as I started to feel more and more sure about YouTube as a marketing channel for my business.
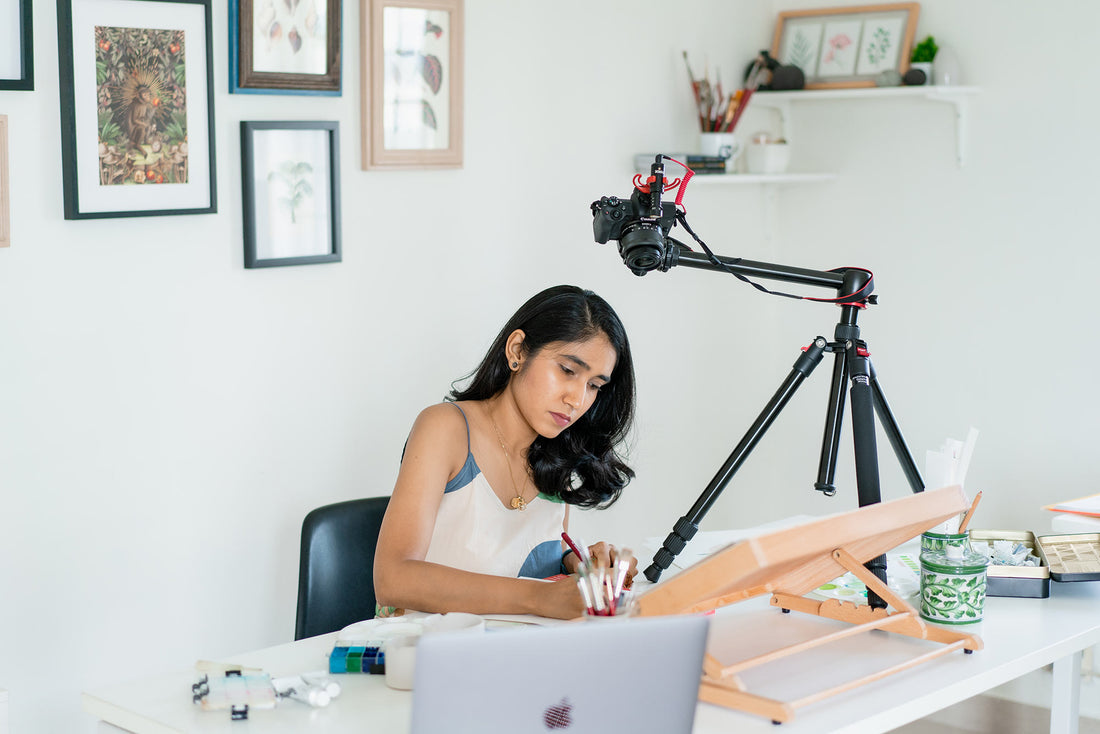
If you’d like to see my studio and gears in action, check out this video. I’ve also got some discount codes for you in the description!
Audio Gear:
If you are creating videos with voice or voice-overs, then a good mic is an essential investment. Bad sound and background noise can be very distracting and can get quite annoying if your videos are in a relatively long format like mine.
I started out with a basic mic worth only Rs 1000 (that’s around $12). It was the Boya M1 Mic and it’s compatible with most phones and cameras. I later switched to Boya M1 Pro and I’m still using this. To be honest, the price difference is not that great so if you’re ok with spending a bit more, you can directly go for the Pro version.
I recently got a more expensive professional mic, the Rode Video Micro. I have this mounted on my camera. This is a great upgrade but unfortunately, this mike is a little too good for my noisy neighbourhood. It picks up even the slightest sounds. Of course, if you are good at audio editing, then you can beautifully isolate and edit unwanted sounds out but since I’m not there yet, I am currently using this mike as a backup mic.
Pro Tip: It’s good to have 2 microphones working when you are recording. This way, if one misses something or picks up any disturbance, you have a backup track.
Video Gear:
I started out recording from my phone. Then it was a OnePlus 8 Pro. If you have an iPhone, your output will be even better. My personal advice would be to not invest in a camera till you’ve tried shooting/recording videos on your current phone and getting comfortable with it. Once you start feeling more confident and sure about creating videos, then you can think about upgrading to a camera.
I only upgraded after creating videos for almost a year. I got myself a Canon M50 Mark II. I am still figuring out how to make the most of it and even now, I sometimes create videos on my phone or use a combination of footage taken on my phone and my camera.
Pro Tip: If you’re getting a camera to shoot videos, remember to get a memory card with larger storage space, a spare battery, and an adapter that will allow you to shoot while staying plugged in. All this will help you with live streams and shooting longer videos more efficiently.
Lighting Gear:
I largely work with natural light and personally, I recommend it, especially if you’re an artist. Natural light not only gives a great output but it is also easy to work with. Having said that, not all of us have spaces that receive good natural light or the mood to create might not always strike when the lighting is perfect.
I initially invested in a relatively inexpensive Ring Light. The one I got came with a mount for my phone, multiple colour temperatures and intensities, and I was able to bend it to take top-down videos too. Personally, I had a bit of an issue with the intensity and shadows it threw while shooting art videos, so I upgraded to an LED Panel light. This worked really well for me. If you have very little light to work with in your studio, then I highly recommend this one.
I recently got the Canvas Lamp which is essentially a ring light but is just so elegantly designed and functions very smoothly. This also comes with a mount for my phone, offers me different light temperatures and intensities, and is great for shooting vertical or top-down videos.
Accessories:
I’ve already mentioned some of the important accessories, but I’ll quickly recap here. These are in my opinion absolute must-haves if you’re using a camera:
- An extra memory card,
- An extra battery,
- A power adapter that lets you shoot while staying plugged in, and
- A memory card reader
Now moving on to stands or in my case tripods. I use the mounts on my Canvas Light to shoot top-down videos and for the vertical videos, I started out with a Gorilla Tripod that I’d mount my phone on. I still use this to mount my LED Panel light when I shoot videos. I then invested in a Vlogging Tripod that helped me shoot vertical videos but also extended into a selfie stick and was basically a good multipurpose stand to have on hand.
The tripod that I’m currently using is the Digitek DTR 520 BH. This one is slightly pricey and I waited a bit before I invested in it. This offers me a lot of flexibility. I can mount my phone or my camera to this and it allows me to record videos from different angles including top-down.
Softwares:
I use DaVinci Resolve to edit my videos. This is such an amazing software to work with and still blows my mind that it’s free. For graphics such as thumbnails, I was using Canva for the longest time but I’ve now graduated to Photoshop.
Tubebuddy is another tool that I use to plan my YouTube videos. This tool helps me plan my keywords, titles, thumbnails, and SEO optimisations. It also has a lot of additional features that allow you to try A/B testing, etc. If you’re starting out, you can either opt for a free version or use the discount code on my YouTube video to try out their basic plan which is the one I am currently on.
Finally, for the background music for my videos, I use Epidemic Sound which gives me access to a lot of stock music and makes it easy for me to find music based on the mood I’m looking for.
I hope this helped make the idea of creating videos a little less daunting! For more details and discount codes, watch my video where I show you my video and audio equipment in action. And do let me know If this helped or if I missed anything. I’d love to hear from you!